If you've ever wondered how to cut a lace front wig so it looks natural and moves like real hair, you're in the right place. This in-depth guide walks you through preparation, tools, cutting techniques, layering, blending the hairline, and finishing touches that pros use to achieve a realistic finish. Whether you're trimming an inexpensive synthetic piece or customizing a premium human-hair lace front, the same principles apply: measure carefully, cut conservatively, and refine gradually. Below you'll find a sequential method paired with pro tips and common mistakes to avoid.
Trimming a lace front incorrectly can ruin the hairline, create uneven layers, or shorten the overall length more than you intended. Emphasizing the phrase how to cut a lace front wig throughout this article is deliberate: mastering this process improves longevity, realism, and styling versatility of your wig. The goal is to blend the lace front hair into a flattering frame for the face while preserving density where it's needed and removing bulk where it isn't. A well-cut lace front will mimic the natural fall of hair and allow for styling options like parting and sweeping without exposing blunt or choppy edges.
Start with a clean, detangled wig. For human hair wigs, wash and blow-dry (or air-dry) before cutting for accurate length. For synthetic wigs, comb gently and ensure fibers are tangle-free; some synthetics may need to be set or steamed to relax curl or wave patterns before trimming. Secure the wig on a mannequin head and stretch the lace so that the hairline is smooth and natural. If you want to preserve the original lace hairline, work with the wig pinned tightly at the temples and nape. If you plan to create baby hairs or a custom hairline, consider trimming before permanently gluing the lace down.
Divide the wig into clear sections. A typical layout: center parting vertical from forehead to crown, two sections at the left and right front (temple-to-temple framing pieces), crown, and nape. Use a rat-tail comb to create clean lines and clips or pins to hold sections in place. Mapping where you want the longest length and where you want layers before you cut prevents overcutting. Remember, cutting should be conservative: you can always remove more, but you can't reattach lengths once removed.
Point-cutting is used for soft ends and removal of bluntness. Instead of cutting straight across, hold the shears vertically and make tiny snips into the ends. This avoids visible blunt edges. Slide-cutting helps when you want to taper ends: gently slide the shears down the hair while closing them to thin the tip gradually. Thinning with shears is perfect for thick bases that sit heavily on the scalp; take limited sections and remove small amounts at a time to ensure a healthy-looking density. When practicing these methods, always work with small subsections and adjust slowly.
Different faces benefit from different approaches: round faces gain length and layers that start below the chin to add vertical lines; heart-shaped faces look balanced with soft layers around the jaw and longer pieces to avoid widening the temple area; oval faces suit nearly all layered styles; square jaws soften with feathery layers and side-swept bangs. Use the wig to create the illusion of a natural fall—this is one reason why understanding how to cut a lace front wig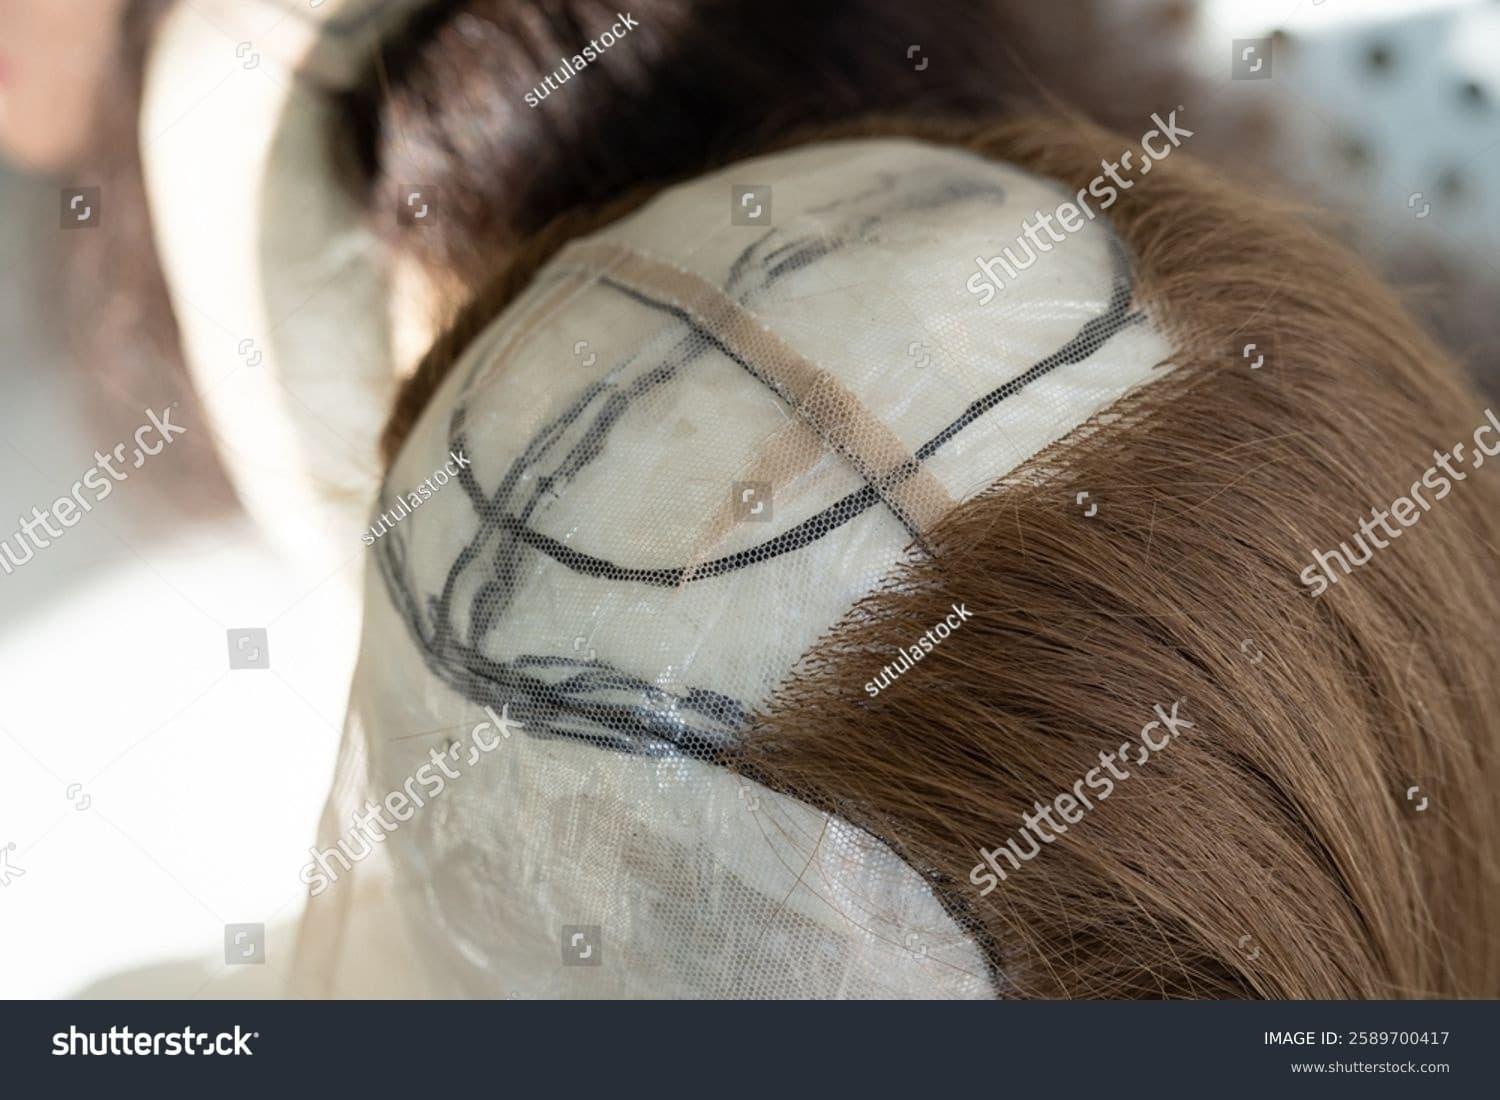 for your client or yourself matters so much.
Do not rush: cutting quickly leads to uneven lengths. Avoid blunt scissor snips across the entire wig—this creates an artificial, wiggy look. Never cut dollops of hair at once; take small snips and continually reassess. Avoid trimming too much from the lace front area; instead, work slowly to create gradual reductions. Finally, never rely solely on a single reference photo; consider multiple angles and natural movement when shaping the wig.
Many stylists recommend creating subtle baby hairs for a believable perimeter. Take the smallest sections at the hairline, trim at varied lengths, and use a toothbrush and a light setting gel to smooth them down. For a more professional finish, tint the knots on the lace (for human hair) to match the scalp tone, or use a concealer along the part to simulate depth. If adding density reduction to the part, use tweezers to selectively remove hairs from the lace and avoid heavy-handed plucking that creates holes.
Keep the shape by trimming every 6–8 weeks depending on wear frequency. Use heat protectant and low-heat settings when styling heat-friendly fibers. For synthetic wigs, retouch shaping with a cold-steam or low-heat tool labeled safe for the fiber. Store the wig on a head form or hanger to preserve shape and avoid creasing. If you glued the lace down, be cautious when washing so the hairline remains intact and any adhesives are gently removed with proper products.
Human hair offers the most forgiving experience: it can be cut dry or wet and heat styled repeatedly. Synthetic fibers may not respond the same way—use heat-safe synthetics carefully and test a hidden section before applying high temperatures. Additionally, synthetic wigs often come with fixed curls or waves that can change shape when cut; always set or steam synthetic fibers in the preferred style prior to cutting for accurate results.
If your wig looks choppy after initial cuts, carefully rework sections with point-cutting and thinning shears to blend. If the hairline appears too sparse after plucking, use a small razor to create softer transitions and consider styling techniques to conceal thin patches. When bangs are uneven, dampen the hair and trim micro-adjustments, or use soft layers around the face to redirect attention from minor irregularities.
Throughout each step, remind yourself of the objective: create a natural silhouette that mimics the fall of real hair. Continually referencing how to cut a lace front wig in practice will help internalize the cautious, iterative approach professionals use. Repetition and gentle adjustments lead to the most realistic outcomes.
Once trimmed, style using low-heat tools (if allowed), volumizing products at the roots for lift, and smoothing serums at the ends to enhance shine. For lived-in texture, finger-style waves or a wide-barrel curl produce softness that conceals any minor imperfections along the cut. Always finish with a light setting spray to hold the shape without stiffness.
If you feel uncertain about altering valuable lace fronts—especially high-end human hair wigs—it may be worth consulting a professional wig stylist. Pros can create custom hairlines, install lace for a seamless finish, and perform micro-adjustments that are difficult for DIYers to execute perfectly. However, armed with the steps above, many enthusiasts can achieve salon-worthy results at home with care.
Start with longer guideline lengths and work in small increments; for natural layers, allow the shortest layers to begin at the chin or collarbone and test how the wig frames the face before removing more length.
It's not recommended to cut while the lace is permanently glued because you risk damaging the adhesive bond and the hairline. Instead, cut and style the wig on a mannequin and then reapply the lace for installation.
Human hair wigs are often cut dry for precision since the hair's fall when dry shows the real length. Wet cutting works too but may reveal unexpected length changes once dry. For synthetics, follow manufacturer guidance—some need to be set or steamed and cut in their styled form.
The process of transforming a ready-made lace front into a customized, natural-looking piece is rewarding. With the correct tools, a methodical approach, and patient refinement, you'll master how to cut a lace front wig and create looks that are realistic, flattering, and versatile.