Wearing a lace-front wig like a pro takes more than just putting it on; it requires preparation, technique, and a few insider tips that help you achieve a realistic hairline, long-lasting hold, and comfortable wear. This comprehensive guide will walk you through everything from prepping your natural hair to final styling and aftercare, with clear steps, practical troubleshooting, product suggestions, and styling inspiration. Whether you are new to wigs or refining your routine, the following sections are crafted to help you master how to wear lace front wig methods while optimizing search-friendly headings and useful on-page structure.
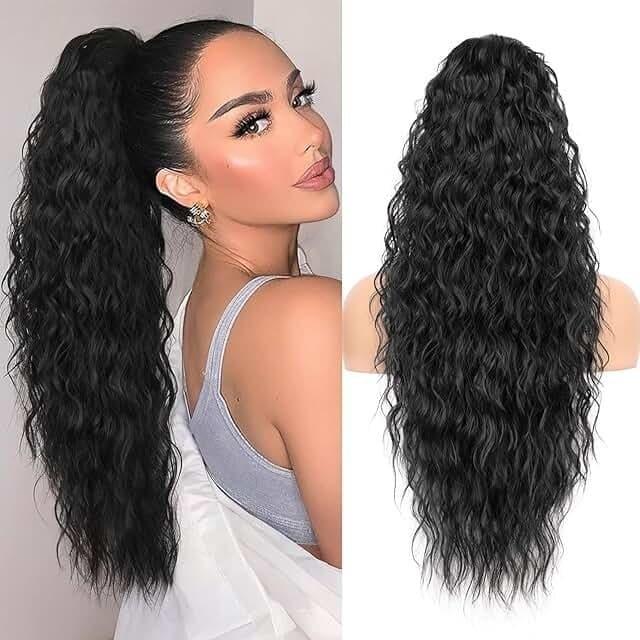
The lace front is celebrated because it creates an undetectable hairline and the freedom to style hair away from the face. Compared with full lace or synthetic caps, a lace-front wig balances realism and affordability. For those searching "how to wear lace front wig," understanding why the lace matters will help you prioritize the techniques that deliver the most natural look.

Before you begin learning how to wear lace front wig, assemble the following items so the process is smooth and uninterrupted:
The following routine is a reliable sequence used by stylists. Read through all steps before starting so you can gather items and set up a clean, well-lit area.
Clean, flat hair creates the smoothest base beneath a lace-front wig. If you have long hair, braid it into flat cornrows or create low, small braids that lay flat. Use a wig cap to cover your hair; pick a cap in a shade that closely matches your scalp. If your hair is short, brush it back and secure it under the cap. Proper prep is a fundamental part of how to wear lace front wig that determines the silhouette of the wig and how seamless the edges will look.
Clean the hairline area with alcohol wipes to remove oils and sweat. If using adhesive, rubbing alcohol or a gentle cleanser helps the glue bond better. Apply a thin layer of barrier spray if you have sensitive skin. When learning how to wear lace front wig with glue or tape, taking these small precautions prevents lifting and irritation.
Pluck the hairline: Many lace-front wigs come with a full, dense frontal that looks unnatural out of the box. Use small, controlled plucks along the hairline—focus on spacing and randomness, not density—to mimic natural growth. Thin out the part if needed for a realistic scalp appearance. If your lace is a different tone than your skin, use a foundation, concealer, or a specialized lace tint to blend the lace with your complexion. This step is central to the aesthetic component of how to wear lace front wig.
Place the wig on a mannequin head or on your head, align the front with your natural hairline, and carefully trim the excess lace. Cut the lace in small sections, leaving a tiny margin to avoid cutting too close. Cut in staggered motions—not a straight line—and take breaks to check symmetry. Accurate lace trimming ensures the wig sits flush and supports seamless blending—another pillar of winning at how to wear lace front wig.
Adhesives: If you want a long-lasting, firm hold, use lace glue or double-sided tape. Apply a thin layer of glue along the hairline, allow it to become tacky (about 30–60 seconds depending on product), then press the lace down and seal with a blow dryer on low. For tape, apply strips to the perimeter and press the lace into the tape.
Alternatives: For short-term wear or sensitive skin, choose a wig grip band or adjustable wig strap that secures the cap without adhesive. Many beginners search "how to wear lace front wig" and start with a wig grip because it provides security without the mess and scalp exposure involved in glue.
After applying the wig, use a blow dryer on low heat or an eyebrow wax stick to gently melt the lace into your skin. This creates that “scalp-less” transition where the lace appears to disappear. Apply a small amount of foundation or powder that matches your skin along the part and hairline to disguise lace translucency. Blending is essential in advanced how to wear lace front wig techniques because it erases visual boundaries.
Trim short strands from the front to make baby hairs. Apply edge control or gel and use a small brush to lay them in natural directions. Don't overdo baby hairs—subtlety is key. Using a toothbrush or edge brush, smooth and style these hairs for a lab-finished look. This nuance differentiates amateur attempts from professional-level how to wear lace front wig results.
Use protective heat settings and heat-protectant products for human-hair lace fronts; for synthetic lace fronts, check heat tolerance. Avoid excessive pulling when styling to protect the knots on the lace and keep the hairline intact. Wrap your hair at night with a silk scarf or bonnet and store wigs on a stand to retain shape.
Bleach the knots carefully if you want a more natural knot appearance; follow precise bleach ratios and monitor the knots closely so you don't over-bleach and weaken the hair. Use a ventilating sealant to reinforce the knots and reduce shedding after bleaching. For installation on oily skin, use a stronger adhesive or combine tape with a wig grip for extended wear. If you prefer a non-adhesive route but need extreme securement for active lifestyles, sew an elastic band inside the cap at the ear-to-ear line for a snug fit—this trick is often used in salons when demonstrating how to wear lace front wig for long days or events.
Brush with a wide-tooth comb starting at the tips then move upward to reduce tension. Apply a leave-in conditioner for human hair wigs and avoid silicon-heavy products that attract dirt. Wash every 7-14 wears or when product build-up is noticeable. Dry gently and reshape on a mannequin head or wig stand. These steps maintain the investment and are part of responsible how to wear lace front wig care.
If the lace lifts within a few hours, check for excess oils on the forehead and reseal with a thin layer of adhesive or tape. Use adhesive remover to safely lift and reapply. For itchy scalps, opt for breathable wig caps, switch to hypoallergenic adhesives, or wear a silk-cotton barrier to reduce friction. When encountering flaking from adhesives, clean base materials gently and use a little olive oil or adhesive remover to dissolve residue without damaging the lace.
Lace type: Swiss lace is softer and blends well but may be less durable; HD lace is ultra-thin for the most invisible hairline. Hair density: Choose natural densities (130%–150%) for a realistic look. Heavier densities require more styling and thinning. When curating your approach to how to wear lace front wig, consider both lace material and density to match your desired aesthetic and maintenance level.
For a custom hairline, color matching, or complicated styling like undercut blends and sewn-in lace fronts, professional installation may save time and yield longer-lasting results. Ask a stylist to pre-bleach and pluck a lace frontal if you're uncomfortable doing it at home.
Use adhesive remover to dissolve glue, gently lift the lace from the corners, and slowly work across the hairline. Never rip the lace off; that can tear the lace and damage the hair. After removal, clean the lace with recommended wig shampoo and conditioner, and let it dry on a stand. Proper removal is part of comprehensive knowledge on how to wear lace front wig, because care during removal preserves the wig for many wears.
If you’re attending an event or traveling, secure your lace front with strong tape or glue and keep a small kit with adhesive, remover, cotton swabs, and extra tape. For athletic activities, a sewn elastic band plus tape or a strong adhesive can prevent displacement. Selecting a method of securement that matches activity levels is a practical extension of learning how to wear lace front wig.

You don’t need to splurge to look polished, but investing in a high-quality lace and human hair (or premium heat-friendly synthetic) will save money in the long run. Recommended items include a high-bond lace adhesive for long events, a wig-specific cleanser, and a mannequin head for styling. Look for products with many positive reviews and clear ingredient lists if you have sensitive skin.
Choose vendors who provide transparent sourcing for human hair and acceptable labor practices. Some companies offer recycled packaging and cruelty-free synthetic fiber options. Your choices can reflect your style and values.
Mastering how to wear lace front wig is a process. Start with non-adhesive methods if you feel nervous, practice trimming and plucking on older or cheaper wigs, and gradually experiment with adhesives and bleaching as you gain confidence. With patience, you will improve your speed and achieve the natural, secure fit you want.
A: Wait at least 24 hours for most adhesives to fully cure. Use water-resistant adhesives if you plan to swim, and always test a small area first.
A: Yes, but rotate wigs when possible, clean the lace regularly, and give your natural hair and scalp a break. Use a gentle care routine and avoid heavy adhesives daily to maintain scalp health.
A: Glue tends to give a longer, more secure hold; tape is quicker and cleaner for short-term wear. Choose based on comfort, sensitivity, and how long you need the wig to stay put.