If you're new to cosplay and want professional-looking hair without spending a fortune, this comprehensive resource will walk you through every step, technique, and troubleshooting tip to achieve durable, character-accurate styles. Emphasis is placed on approachable methods for beginners while including pro tips so your costume-grade wig stays shaped and camera-ready all day. The central focus here is on the phrase how to style synthetic wig cosplay, illuminated across sections to help searchers and creators find the best practices quickly and reliably.
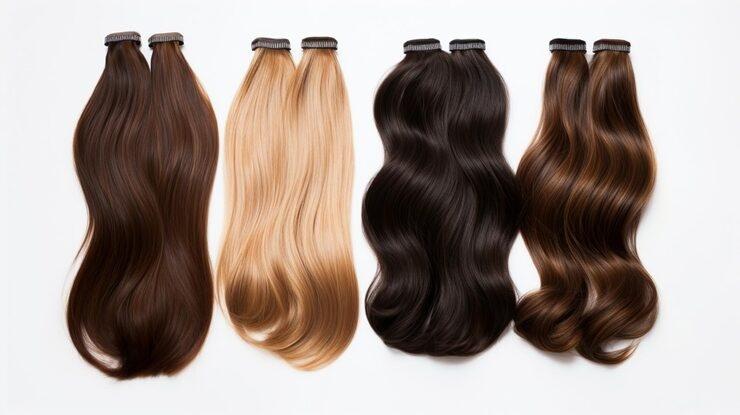
Choosing the right wig lays the groundwork for easy styling. Not all synthetics are equal: heat-friendly fibers (often labeled "heat resistant" or "high-temp") allow steam and low-heat tools, while standard acrylic fibers will melt under heat. Look for density, cap construction (lace front vs. basic cap), fiber sheen (matte or shiny depending on the desired look), and fiber length. For many characters, a lace-front synthetic wig will give the most natural hairline and versatility.

Before cutting or shaping, gently detangle the synthetic wig with a wide-tooth comb. If it's dusty or has product buildup, wash with wig shampoo in cool water, rinse fully, and apply conditioner if recommended. Dry on a wig stand to maintain shape; never use a hairdryer at high heat on non-heat-safe fibers. Prepping sets a clean base for long-lasting style and preserves fiber integrity.
Mount the wig on a foam head or plastic mannequin and secure it with T-pins. A stable positioning facilitates precise cutting and styling. For lace-fronts, place the wig slightly forward on the head to simulate natural placement, then mark the ear tabs and center part to keep symmetrical edits.
Use sharp shears and take your time: make small, deliberate snips when trimming bangs or creating layers. Thinning shears can soften blunt edges and reduce bulk—use them at the ends, not the root, for a natural feathered finish. If you’re trying to emulate a specific character cut, reference multiple images: front, side, and back views are essential. Avoid removing too much at once; you can always cut more.
For heat-friendly synthetics, a low-heat flat iron set to the manufacturer's recommended temperature can smooth, curl, or create waves. Use a heat-protectant spray formulated for synthetic fibers and work in small sections. For heat-sensitive wigs, steaming is the safer alternative: small amounts of steam soften fibers and allow you to mold them into rollers or shapes that set as they cool. Velcro rollers and foam rods are excellent for long-lasting curls without direct heat.
To lock in complex structures (spikes, gravity-defying styles, or sculpted buns), use a combination of internal support and strong-hold products. Internal supports include wire frames, hair nets, or bundled foam beneath the outer layer. Secure the shape with wig-specific glue or gel at the base, and finish with multiple light coats of high-hold wig hairspray. Allow each coat to dry before adding the next to avoid tackiness. Reinforce with strategically placed bobby pins and elastic bands hidden within the style.
To add highlights or shade depth without permanent dye, use colored wig sprays or diluted fabric dye for heat-resistant synthetics following test patches. You can also purchase pre-gradient wigs or mix several wigs to create layered color depth. For battle-worn or weathered looks, matte finishing sprays and careful backcombing produce realistic texture.
For a convincing hairline with a lace-front, trim the lace carefully and glue only the edges to avoid peeling. Silicone or water-based adhesives have different wear-time and skin compatibility—perform a patch test. Use an eyebrow pencil or foundation that matches the scalp color for the part to minimize contrast between lace and skin. Tiny baby hairs (trimmed and glued sparingly) soften the forehead edge and look natural on camera.
Spikes and angular short cuts require texturizing and strong-hold products. Twist small sections, apply a small bead of styling glue or gel, and set with a quick blast of steam if the fiber tolerates it, or cool firmly in place if using a moldable support. Use a sculpting comb to define each spike and finish with a matte hairspray to avoid unnatural shine under photoshoot lights.
Proper care extends the life of any cosplay wig. Store styled wigs on a stand or in a breathable bag with the shape supported. For long-term storage, cover with a hair net and place tissue paper inside shapes such as buns to maintain form. Regularly detangle gently from tips to roots, and avoid oily products that can weigh synthetic fibers down.
Pack a small emergency kit for events: a travel-sized wig spray, a few bobby pins, clear elastic bands, tiny containers of adhesive, and a mini steamer or hand-crimper. If bangs fall flat, a quick mist of detangler and a round brush with a gentle blow-dry (on cool or low heat if fiber allows) can revive volume. For loose wefts, a needle and color-matched thread will reattach them quickly backstage.
For competitive cosplay, prioritize symmetry, durable inner structure, and photo-proof finishing. Structure the underlayer with wires or reinforced sections, use multiple safe adhesives for high-stress edges, and double-check lighting in your photos to adjust sheen and shadow with matte sprays or contrast-enhancing products.
When transporting a styled wig, use a sturdy, upright wig travel box with internal supports. If you must compress the wig, wrap the style gently in tissue and secure with a soft net to minimize frizz. At the venue, recheck pins and adhesives before going on camera.
When documenting your process online, include clear, searchable phrases such as "how to style synthetic wig cosplay", step-by-step captions, equipment lists, and time-lapse videos. Use alt text on images that describes techniques (e.g., "heat-safe synthetic wig final curl set") and add timestamps for tutorial chapters to improve discoverability. Well-structured headings (
Try mixing related search intents: "synthetic wig styling tips", "cosplay wig shaping for beginners", "heat-safe wig techniques", and "make long-lasting cosplay wig style". Placing the primary phrase how to style synthetic wig cosplay in early headings and repeated naturally throughout helps maintain keyword relevance without stuffing.
For action-heavy cosplay, ensure your wig is balanced so the weight doesn't shift. Sew in an elastic strap between ear tabs for a snug fit and use micro-pins for motion resistance. Re-check adhesives after any vigorous movement or costume changes.
Invest in at least one quality wig stand and T-pins. Choose products labeled specifically for synthetic wigs—those formulated for human hair may contain oils that degrade synthetic fibers. Keep a travel kit of compact pins, mini-steamer, wig brush, and a high-hold spray for on-the-go adjustments.
Participate in forums, social media groups, and pattern exchanges to learn from other creators. Sharing before-and-after photos with detailed captions helps you get constructive feedback and improves your search visibility when you post tutorials online.
Styling a synthetic cosplay wig is both a craft and a science. By following staged preparation, careful cutting, secure internal support, and suitable finishing products, anyone can create dramatic, long-lasting styles. Repetition and patience are as important as the right tools—practice makes repeatable, reliable results. The search phrase how to style synthetic wig cosplay represents a set of techniques that, when mastered, let you bring virtually any character to life with confidence.
Only if the wig is explicitly labeled heat-resistant. Use the lowest recommended temperature, a heat-protectant made for synthetics, and work in small sections. When in doubt, use steaming or rollers instead.
Regular gentle detangling from tip to root, proper storage on stands, occasional conditioning treatments made for synthetics, and avoiding friction (collars and rough fabrics) will reduce tangles.
Permanent dye doesn't work on most synthetic fibers. Some heat-resistant fibers accept specialized fabric or hot-water dyes but always test a small section first. Spray-on temporary colors are safer and good for photoshoots.