If you've wondered how to cut wig bangs at home and wanted results that look like they came from a salon, this comprehensive guide walks you through every consideration, method, and troubleshooting tip you need. Whether you're working with a lace front, full-cap human hair wig, or a heat-stable synthetic piece, learning controlled, repeatable techniques will help you achieve natural-looking bangs. This article uses clear headings, practical steps, and SEO-optimized phrases like how to cut wig bangs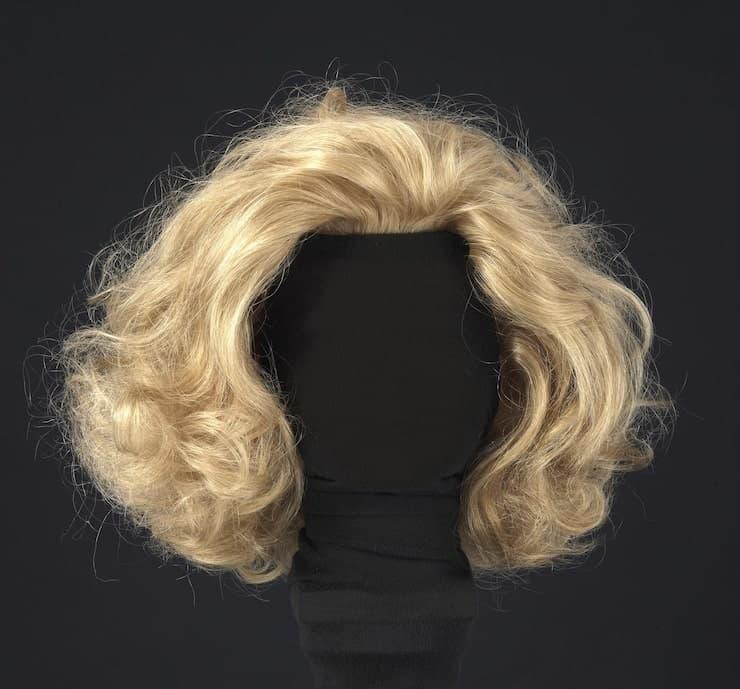 so you can find the right tips quickly and reapply them with confidence.
Trimming bangs on a wig allows you to: customize face-framing, update a style without buying a new wig, and fix production or shipping inconsistencies (some bangs arrive too long or uneven). You gain creative freedom—pin-up bangs, curtain bangs, baby bangs, or soft side-swept fringes—without permanent commitment. Learning how to cut wig bangs saves money and lets you adapt your wig to your facial proportions, style trends, or makeup looks.
Proper prep reduces mistakes. Secure the wig on a mannequin head or turn it on your head with a wig cap tightly fitted. Identify the hairline and separate the section you plan to turn into bangs. For lace fronts, keep the lace intact and avoid cutting into the lace material unless you know how to re-seal edges. For a natural look, determine the density and length you want using reference photos. If you're practicing, use an inexpensive wig first. A common beginner-friendly goal is to create medium-length curtain bangs or soft blunt bangs because they are forgiving and easy to adjust in small increments as you work.
1) Decide on length: Hold a comb from the bridge of the nose down and visually estimate where the bangs should sit—above the brows for micro bangs, on the brows for baby bangs, or below the brows for longer fringes. 2) Section the hair: Create a triangular or rectangular section centering above the hairline. Use clips to secure the rest. 3) Wet or detangle: For human hair wigs, lightly mist the section so it lays naturally; for synthetic wigs use product or practice dry technique if the fiber becomes distorted by water. 4) Anchor: With fingers or a comb, hold the hair at the desired tension and perpendicular to the face. 5) Cut tiny amounts: Begin by cutting 1/4 inch (6mm) or less from the intended length, then check and adjust. 6) Refine: Use point-cutting into the ends to soften the line and remove heaviness. 7) Style and assess: Blow-dry (if human hair) and use heat styling cautiously on synthetics. Check how bangs sit when styled; tweak as needed in 1/8 inch increments.
Curtain bangs require center parting and graduated lengths to sweep to the sides. 1) Make a precise center part and pull two triangular sections forward, leaving wisps on the sides for layering. 2) Cut the center piece a touch shorter than the sides; the sides should taper gradually. 3) Use slide-cutting: Place scissors horizontally and slide outward from the center to create tapered ends that feather naturally. 4) Use a round brush and a blow-dryer or heat-friendly tools to train curtain bangs to the sides. Curtain bangs flourish with volume at the roots and thinner, airy ends.
Textured bangs give a modern, lived-in look. After sectioning: 1) Hold vertical sections and point-cut into the hair to create irregular lengths. 2) Use thinning shears intermittently to remove bulk and break up an otherwise harsh line. 3) For synthetic wigs, gentle heat or steam helps relax set fibers to blend the texture. Choppy bangs work best with a light product—pomade, paste, or light hairspray—rather than heavy creams.
Layering near the part, micro-trimming the hairline, and using razor techniques can mimic natural hair growth patterns. If you have a razor, correct technique involves soft, feathering strokes angled away from the face. Only attempt a razor after you’re comfortable with scissors because razor cuts are less forgiving. For human hair wigs, consider thinning the base slightly to replicate finer baby hairs and natural density changes. For lace fronts, carefully trim the lace perimeter but never cut into the wig hairline without a plan to secure the lace afterward.
Blending is where wigs start to look authentic. Use very small horizontal snips to feather the ends, soften the transition between bangs and the rest of the hair, and ensure there's no blunt contrast. If the wig is long, style the bangs to fall seamlessly into the layers. For short wigs, keep the bangs slightly choppy to avoid a wiggy look. Remember, the human eye notices sharp, straight lines more than soft, graduated transitions—softness equals realism.
Human hair wigs: Treat like natural hair—use wet cutting for precision, heat tools for shaping, and high-quality products. Synthetic wigs: Many modern fibers are heat-friendly, but always check the manufacturer's temperature limits. When in doubt, practice dry cutting and style with steam or low heat. Lace-front wigs: Protect the lace; adjust your hairline carefully; if you trim lace, reseal with adhesive or professional techniques to avoid fraying. Full-cap wigs: Work from the cap's natural growth direction and use subtle layering to avoid exposing weft lines.
If bangs are too short: add temporary length with clip-in fringe pieces or redistribute longer side hair to cover. If bangs are uneven: soften with point-cutting and thinning shears; never take more bulk off without testing. If the hairline looks blunt on a lace front: add micro-trimmed baby hairs and slightly pluck the hairline to create irregularity. If synthetic fibers appear frizzy after cutting: use a steam treatment or apply a small amount of synthetic-friendly smoothing product low on the fiber to tame frizz.
Finish trims with appropriate styling: blow-dry human hair bangs with a round brush for volume, use a flat iron for sleek looks, or scrunch with a small amount of texturizing product for a lived-in finish. For synthetic wigs, use products made for synthetic fibers and follow heat limits. Remember, the way you style your bangs affects perceived length and density, so always do small final trims after the intended styling method.
Wig bangs usually require touch-ups every 2-6 weeks depending on wear frequency and styling. Human hair bangs will adapt to your styling habits and may require trimming more often if you consistently style them shorter. Synthetic bangs can be reshaped with steam or low heat and may retain a cut longer if the fiber is set. Keep your tools clean and sharpened—dull shears cause jagged, uneven cuts.
Seek salon help if you plan to: significantly alter cap structure, reshape lace fronts extensively, or perform complex layering on expensive human hair wigs. Professionals can reconfigure weft density, reseal lace, and blend hand-tied sections in ways that are difficult to replicate at home.
Blunt cut: straight horizontal cuts for a bold fringe, but soften with point cutting. Point-cutting: scissors vertical and snipping ends to create texture. Slide-cutting: use scissors sliding along the hair to thin and taper. Thinning: use thinning shears to reduce density subtly. Each technique contributes to a believable, modern bang when combined thoughtfully.
Example A: If you want a soft eyebrow-length curtain fringe, work wet on human hair, comb straight down, and trim center first slightly shorter than desired, then angle outward. Example B: For a choppy micro fringe on synthetic: dry cut using point-cutting, then steam lightly to set shape. Example C: For a thick full-cap wig that appears heavy at the front, remove bulk with thinning shears before shaping to avoid a helmet look.
Treat your wig gently—avoid excessive heat on synthetics, store on a stand, and use gentle shampoos. Patch-test any chemical or heat product to confirm fiber compatibility. When cutting bangs, make micro-adjustments and secure the rest of the hair to prevent accidental snips. Keep a repair kit for lace-fronts or loose wefts, and consider professional maintenance annually to recondition and re-style costly pieces.
To recap, the path to learning how to cut wig bangs involves preparing the wig, selecting the right technique for your desired style, using the correct tools, cutting conservatively, and refining through layering and texturizing. Style immediately to evaluate the final look and perform last-minute micro-trims. With practice and patience, your home cuts can rival those from a stylist.
Introduce irregularities: slightly staggered lengths or a few responsibly thinned areas mimic natural hair loss patterns and baby hairs. Use lightweight root-lifting products to create natural-looking volume and avoid a flat wiggy appearance. Match the density of the bangs to the rest of the wig—too dense bangs look unnatural unless the entire wig is dense.
If the wig has pre-set layers or factory bangs, assess whether they simply need softening rather than a full recut. Pre-colored wigs with highlights may reveal blunt cuts quickly—blend to avoid stark lines through subtle point cutting. For very short micro bangs that came out uneven, create a deliberate asymmetry with a side-swept angle to make the unevenness appear stylistic.
Start on cheap practice wigs and take photos at each step to learn how trimming changes appearance when styled. Keep a small notebook of what worked—angles, lengths, and products—so you can replicate the result. Video yourself to spot posture errors and to build muscle memory for consistent sectioning and scissor placement.
how to cut wig bangsFinally, remember: subtlety wins. Small, thoughtful trims mean you can always adjust further, but you can't reattach what you cut off. Use the techniques described here—sectioning, point-cutting, slide cutting, and blending—to achieve that natural, salon-quality fringe at home, tailored to your face and lifestyle.
Dispose of synthetic wig offcuts responsibly and clean your tools after every session. Consider donating practice wigs to schools or creative programs. If a wig is beyond repair after an aggressive trim, parts may be used for crafting or decoration rather than landfill.
 Every 2-6 weeks depending on wear and styling. More frequent trims keep the shape precise; less frequent trims work if you prefer a looser, grown-out look.